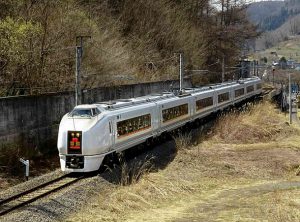
『SLばんえつ物語』号への誘(いざな)い

English Version

Fe@NJ です。こんにちは。

1.ばんえつ西線さいせんの快速『SLばんえつ物語』号(新潟県 新津にいつ駅~福島県 会津若松駅)(以下、「ばんえつ物語」と略記)ですが、冬期運休が終了し、今年は3月31日に運行が再開され、秋まで、原則、土日に運行される予定です。


2.「ばんえつ物語」の特徴は以下のとおりです。

(1)日本国内の蒸気機関車(SL)が牽引する「SL列車」の中で、最長の運転距離(片道約111km)を誇る。


(2)客車7両編成・全席指定席で、両端2箇所・中間の1箇所に展望室を備える。

編成は、会津若松方より

SL(会津若松行きの先頭)・・・往路の進行方向↑

1号車   展望車

2号車   普通車

3号車   普通車

4号車   展望車

5号車   売店・普通車

6号車   普通車

7号車   グリーン車・展望室

SL(新津行きの先頭)・・・復路の進行方向↓


(3)特にお勧め! 7号車はグリーン車で2+1のアブレスト。その展望室はグリーン車の乗客専用となっており、追加となるグリーン料金は、全区間乗車の場合、片道¥1,670とリーズナブルである。


3.時刻表は下記の通りです。

往路・・・新津1005 →会津若松1335

復路・・・会津若松1525 →新津1840

日帰りで全区間の往復だと時間がタイトですが、会津若松で「鶴ヶ城」(国の史跡)のみならば、タクシー利用にて、早足で見学出来そうです。

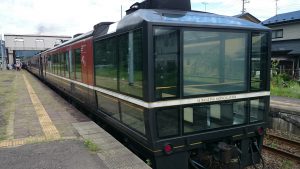
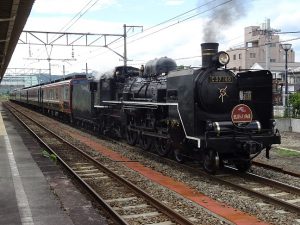
①『ばんえつ物語』

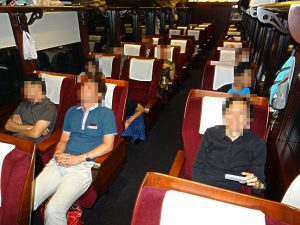
②グリーン車の展望室

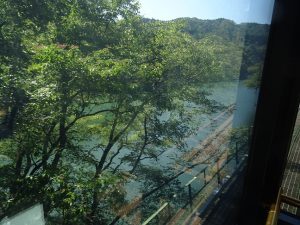
③グリーン車の展望室より(往路)

往路は流れ去る景色を楽しめる。

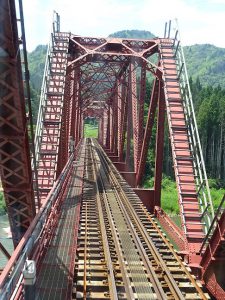
④グリーン車の展望室より(往路)

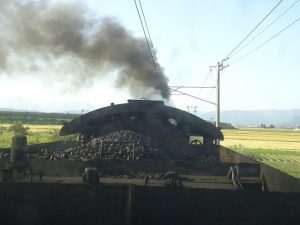
⑤グリーン車の展望室より(復路)

復路は目の前のSLの動きが楽しめる。

⑥グリーン車

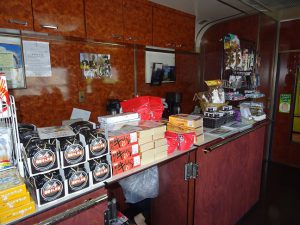
⑦売店

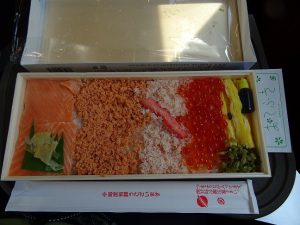
⑧駅弁、売店で購入

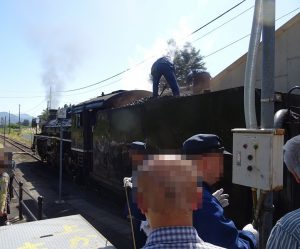
⑨途中、津川駅でのSLの整備風景

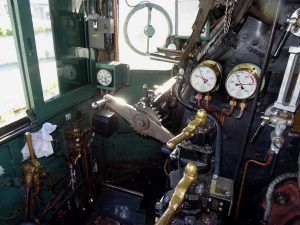
⑩SLのコックピット


【ご注意】

本稿における時刻表・列車の仕様、等の情報は本ブログの執筆時点(2018/3/26)のものです。今後、変更される可能性があります。


それではHave a nice trip!

Asking to “SL Ban-etsu Monogatari”

Japanese Version

Hi, this is Fe@NJ, who has passed Second Grade of Timetable Test in Japan.


  1. A rapid train, “SL Ban-etsu Monogatari“, (abbreviated as “Ban-etsu Monogatari”) serviced between Niitsu, Niigata Prefecture and Aidu-Wakamatsu, Fukushima Prefecture via Ban-etsu Sai Line, shall be resumed on March 31 this year, after the end of the suspension holidays in winter. It is scheduled to be operated on weekends, as a general rule, until fall.


  1. Features of this train

(1) It is proud of the longest run (approximately 111 km / 69 miles) for one way during the trains powered by steam locomotive (SL) in Japan.


(2) This 7-car train, of which all seats are reserved, has observation cars/rooms at both ends and at the middle.


The Car Layout is as follows:

SL(For Aidu-Wakamatsu, on this side)(Progress direction of outbound travel ↑)

Car no. 1: Observation Car

Car no. 2: Ordinary Car

Car no. 3: Ordinary Car

Car no. 4: Observation Car

Car no. 5: Kiosk and Ordinary Car

Car no. 6: Ordinary Car

Car no. 7: Green Car, extra charged (First Class, 2+1 abreast), with Observation Room for the green car passengers only

SL(For Niitsu, on this side)(Progress direction of inbound travel ↓)


(3) Green Car is especially recommended!  The additional green fee is reasonably priced at 1,670 yen for each way in all sections.


  1. Timetable

Outbound・・・Niitsu Lv 1005 → Aidu-Wakamatsu Ar 1335

Inbound・・・ Aidu-Wakamatsu Lv 1525 → Niitsu Ar 1840

Although it is tight to take a day and round trip in all sections, you could visit at Tsurugajo Castle (national historic site) in Aidu-Wakamatsu, as a quick sightseeing by taxi.

①Ban-etsu Monogatari

②Green Car with Observation Room

③View from Observation Room of Green Car (outbound)

You can enjoy the scenery going away on the outbound route.

④ditto

⑤View from Observation Room of Green Car (inbound)

Enjoy SL’s movement just in front of you on return.

⑥Green Car

⑦Kiosk

⑧The box lunch is available at Kiosk.

⑨Maintenance scenery of SL at Tsugawa station

⑩Cockpit of SL


【Remarks】

The information herein, such as timetable, specification of the train and so on, are current as of March 26, 2018.  They may be modified.


Thank you and have a nice trip in Japan!

ネットジャパンセミナー便り36号 ~ 2018年4月セミナー日程

この週末、3月17日(土)に東京の桜の開花発表がありました。

先月まだつぼみだったおかめ桜は、終わりかけですが満開で今が見頃です。

日本橋の桜は来週末くらいから見頃になりそうです。


福徳神社の椿は、花が下から上までみっちりついていて、見応えがあります。

花が咲き出す春は、花粉症でつらいですけど、花を見ながらゆっくり歩くと

気持ちのリフレッシュもできます。


そして毎年大人気のイベント「第6回 日本橋エリア日本酒利き歩き2018」が

4月14日(土)開催されます。

http://sasas.jp/blog/event/kikiaruki6th.html

弊社のスタッフも、既に前売り券購入済みだそうです。

飲みすぎにだけご注意ください。


4月のセミナーはServer Edition を中心としたセミナーです。

世の中は春で華やいでいても、トラブルはいつ発生するかわかりません。

何かあってもすぐに復旧できるよう、是非ActiveImage Protectorでのバックアップをご検討ください。


4月18日(水) ActiveImage Protector Server Edition + ImageBoot  14時から17時

第一部はActiveImage Protectorのデモを交えた製品概要説明

第二部は実機を使用した体験です。実習内容は以下になります。

  1. Server Editionのインストール
  2. 重複排除機能を含めたバックアップ設定
  3. バックアップイメージファイルからの復元
  4. バックアップイメージをImageBootで仮想環境上で起動
  5. ImageCenter LEでイメージファイルの結合とレプリケーションを実行


4月25日(水) ActiveImage Protector Server Edition + vStandby AIP  14時から17時

第一部はActiveImage Protectorのデモを交えた製品概要説明

第二部は実機を使用した体験です。実習内容は以下になります。

  1. ActiveImage Protector Server Editionのインストール
  2. 重複排除圧縮機能を含めたバックアップ設定
  3. バックアップイメージファイルからの復元
  4. vStandby AIPで、ESXiホスト上にスタンバイ仮想マシンを作成

セミナーのお申込みはこちらから

https://www.netjapan.com/jp/local-japan/seminar

ActiveImage Deploy USB リリース

ActiveImage Deploy USBリリース

ワンストップ クローニング

ActiveImage Deploy USB はPCのキッティングの中心作業であるクローニングをワンストップで効率的に行えるツールです。

キッティングはあらかじめOSやアプリケーションを設定した、同一のPCを大量に作成する作業ですが、仮に一台一台インストール作業を行ったら、膨大な時間がかかります。そこで、近年ではハードディスクイメージを対象マシンのハードディスクに展開していくことで同一設定のPCの複製を行うというのが標準的な作業になっています。

ネットワークを使ったよくある作業手順は、

  1. 配布用ネットワークを準備
  2. 配布用サーバーを準備
  3. PXEサーバーを設定
  4. リファレンスマシンにsysprepをかけてライセンス情報を削除して、シャットダウン
  5. コールドイメージを作成して配布用サーバーに配置
  6. PCを箱から出して、モニター、電源ケーブルを接続
  7. ネットワークケーブルを接続
  8. 各PCの電源をいれて、PXEで起動
  9. マルチキャストセッションを開始
  10. 全PCでクライアントが起動するまで待機
  11. 各PCでディスクイメージを展開
  12. 完了後、シャットダウン
  13. セッション終了
  14. 各PCを箱詰め

というものです。マルチキャスト、PXEを使ったクローニングは一度に大量に複製する場合はメリットがありますが、配信環境や物理的なスペースの確保といった事前の準備や計画が必要になり大掛かりな作業になりがちです。

配信環境の設定にあたる1,2,3 はそれなりの知識と技術が必要になりますので現場のエンジニアによってはハードルが高い場合もあります。また、8~13の配信セッションは同時配信ですので同期的に行う必要があり、セッション毎に準備、待機時間が発生します。また台数が多い場合はセッションを繰り返す必要があります。

たとえば100台のキッティング作業をスペースの問題などで10台ずつ行う場合、合計10回のセッションを行う必要がありますが、ネットワーク経由での配信はそれなりに失敗がありますので、もう数セッションは必要になります。また、数台ずつ複数モデルのクローニングを行う場合はその都度、設定が必要になります。

電源オンだけの迅速なキッティング – No Click , No Storage, No PXE

Deploy USB Welcome 画面

ActiveImage Deploy USBでは以下のような手順になります。

  1. ActiveImage Deploy  USBでデプロイ用USBメモリを作成
  2. リファレンスマシンにsysprepをかけてライセンス情報を削除して、シャットダウン
  3. リファレンスマシンにデプロイ用USBメモリを挿して起動
  4. USBメモリ内の保存領域にバックアップを作成して保存
  5. PCを箱から出して、モニター、電源ケーブルを接続
  6. デプロイ用USBメモリをPCに挿して電源を入れる
  7. デプロイ用USBメモリから高速に起動
  8. 自動的に復元開始 (オートラン機能を使わない場合は1クリック)
  9. 完了後、シャットダウン
  10. PCを箱詰め

難易度の高い配信環境の設置は不要で、USBを挿入、電源オンだけで作業が完了します。

デプロイ用USBメモリ 起動画面

繰り返し行うキッティング作業に有効

作成したデプロイ用USBメモリはライセンスされた復元回数までくりかえし復元ができます。マルチキャストを使う場合と異なり、ActiveImage Deploy USB のデプロイ用USBメモリでは各PC毎に独立してクローニングを行います。そのため対象マシンのクローニングを逐次処理していくことが可能です。たとえば、100台の場合、デプロイ用USBメモリを10個作成しておいて、10台箱から出して、順番にUSBメモリを起動して自動復元、完了したらUSBメモリを抜いて梱包しつつ、次のPC(11台目)を出して、USBメモリを挿してを繰り返していけばよいわけです。起動も復元もUSBメモリなので高速で確実です。

また、あとから数台追加、という場合でも配信環境は必要ないので、以前作成したデプロイ用USBメモリをそのまま使用すればよいだけです。

また、設定の違う複数のモデルの場合でもモデルの種類だけUSBメモリを作成しておけば、好きな時に好きな台数だけクローニングをすぐに行うことができます。マルチキャストやPXEのように一々配信環境の準備をする必要がないため、オーダー1台毎でも、その場ですぐにクローニングを行うことができます。

繰り返し行う必要があるキッティング作業だからこそ、使えば使うほど効果的なコスト削減になります。

エンドユーザー用 復元専用USBメモリ

キッティングしたPCは実際に使用するエンドユーザーに渡され使用されます。ユーザーのPCにトラブルが起きた時に簡単にユーザー自身で初期状態に戻せる方法があったら便利です。 例えば、リカバリー専用の、起動可能な、復旧イメージの入ったUSBメモリがPCに添付できればユーザー自身でワンクリックで復元を行うことができます。デプロイ用USBメモリはキッティング用なので復元回数をライセンスしていますのでそのまま配布はできませんが、リカバリー専用のUSBメモリをユーザーのPCに添付して配布できるライセンス ActiveImage Deploy  USB plus を用意しました。キッティングPC数と同じ数だけ復元回数無制限の復元用USBメモリを作成して添付できます。

起動用Windows PEのカスタマイズ

ActiveImage Deploy  USBではWindows PEを使用して起動環境を作成します。一般的な構成のPCであればPEだけでもMicrosoftが提供しているドライバー類でサポートできますが、サーバー用途のストレージカードなど専用のドライバーが必要な場合があります。 ActiveImage Deploy  USBのデプロイ用USBメモリ作成ウィザードではPE起動時に組み込むドライバを追加できますので、使用時にストレージが見えないという問題も簡単に解決できます。

USBメモリへドライバーを追加


評価版がありますのでお試しください。

Game

今でも衰えない据え置き機のゲーム。
その中で、筆者が多くの時間を割いて遊んだゲームを紹介します。

1)ドラゴンクエスト(ファミコン)
よく知られるRPG。
特に好きだったのはDQ4。
カジノで838861枚のコインが安く買えてしまう。
初期ロットのみだが、メタルキングが聖水で一撃。
8回逃げると、以降すべての攻撃が会心の一撃になる(ラスボスも)。

2)ロマンシングサガ(スーパーファミコン)
特にロマサガ3が大好き。最初に8人のキャラを選べるが、
ほぼ全てのキャラで開始し、ラスボスクリアをした。
伊藤賢治さんのバトル曲が素晴らしい。四魔貴族バトル2最高。

ロマサガ2はラピッドストリーム+クイックタイムに頼りすぎた。
ロマサガ1はデータが良く消えた。

3)ロボット大戦シリーズ(多数の機種)
様々なアニメのロボットがゲームで使用できる。始めたのは第4次から。

大きく分けてリアルロボットとスーパーロボットで大別される。
知っているものから知らないものまで盛りだくさん。

現在もリリースされており、今はそうでもないが、
スーパーロボット系のマシンの命中率が酷く、
強い敵への命中率は0%でほとんど必中(精神コマンド)が必須になるという鬼仕様。
お気に入りはバンプレストオリジナル機体のアンジュルグ。

また、2)でも少し取り上げていますが、
これらのゲームはサウンドが素晴らしい物ばかりです。

他にも沢山ありますが、それはまた別の話。

電車でスキーに連れてって♪

English Version

Fe@NJです。こんにちは。

ウインタースポーツはシーズン真っ只中ですね!

スキー・スノボというと、現地までの交通手段は「クルマ」とか「ゲレンデ直行バス」が一般的かも知れませんが、今回は、鉄道ファンの私より

電車でスキー・スノボ(+温泉・ポケモン)

の提案として、首都圏から片道3時間台で行けるスノーリゾートとして

万座温泉スキー場」「鹿沢スノーエリア
を紹介したいと思います。

いずれも、ハイシーズンは雪質最高、アフタースキーは温泉も楽しめます。また、規模としては中~小クラスですが、空いています(交通が多少不便だから?)。

1.電車で行くメリットは、
(1)楽、座席はバスより広い、シートベルト無し。
(2)速い、時間が正確、渋滞無し。
(3)車中、ポケモンで遊べる。

2.電車で行くデメリットは、
(1)乗り換えが大変!
(2)荷物の運搬が面倒!
(3)最寄り駅からリゾート地までの交通手段を別途確保しなければならない。

3.各スノーリゾートの最寄り駅は、JR東日本の万座・鹿沢口」(まんざ・かざわぐち)駅です(以前、別のトピックでも登場しました)。

上野からJR東日本の特急草津1号へ乗車。(10:00発)

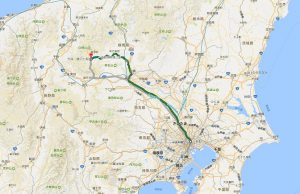
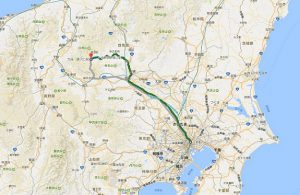
①ルートマップ

②特急草津

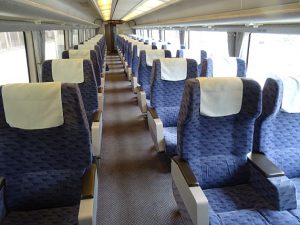
③特急草津のグリーン車

終着駅の「長野原草津口」(ながのはらくさつぐち)駅で、下り普通列車に乗り換えます。

乗り換えは、同一ホーム同士ですので楽です。(12:18着⇒12:24発)

4駅目、万座・鹿沢口駅で下車します。(12:42着)

同駅のホームは築堤上にあり、地上交通機関(バス、タクシー等)への乗り換えのため、階段を下ります。

ポケモンのジムがあります。

なお、電車・バスの運行スケジュールは最新の時刻表で確認してください。


「万座温泉スキー場」

西武グループの路線バスへ。(13:01発)

万座バスターミナルへの到着(13:44着)に合わせ、各宿泊施設のマイクロバスが迎えに来ます。

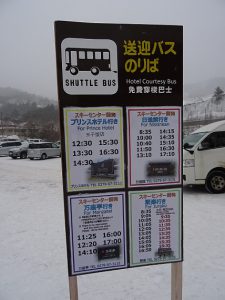
各宿泊施設~「万座温泉スキー場」間はシャトルバスが運行されています。

④シャトルバス停

本日は移動日ということで、着後、足慣らしに2~3時間滑るのも良し、あるいは、割り切って、早めに雲表の露天風呂を楽しむのも良し・・・だと思います。

特長

(1)雪質最高! トップの標高約2,000mを誇る。

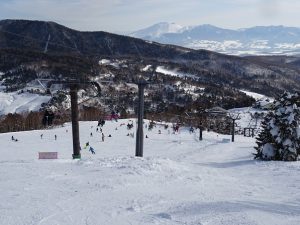
(2)メインのゲレンデは、万座プリンスホテルと直結。華やかさを感じる。

⑤メインゲレンデのトップ

(3)サブのゲレンデ(万座山リフト沿い、中級)は穴場。

(4)広大な景色! 快晴ならば、浅間山の先に富士山も見える。

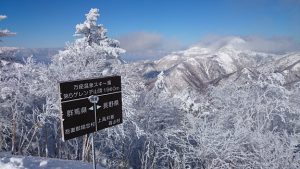
⑥県境の看板

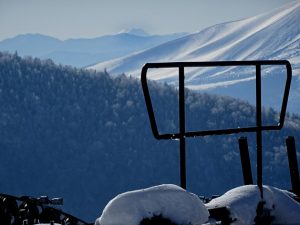
⑦ズームアップすると、浅間山の向こうに富士山が!

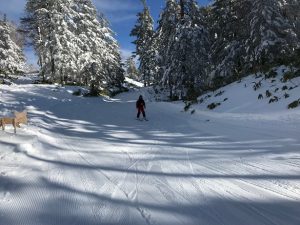
⑧林間コース

メモ

○本稿の執筆時点で、万座・鹿沢口駅~万座バスターミナル間の定期便は、一日4往復のみです。

○どうしても午後イチから滑りたい場合は、北陸新幹線・軽井沢駅発09:35のバスを利用すると、万座バスターミナルに11:19に着きます。


「鹿沢スノーエリア」

もう一つの選択肢として、万座・鹿沢口駅から、新鹿沢温泉・鹿沢スノーエリアへ。

こちらのほう、同駅~宿泊施設・スキー場を結ぶ路線バスはありません。

宿泊予約の際、万座・鹿沢口駅の送迎付きプランを依頼するか、または同駅からのタクシーを予約しておくことになります(所要約25分)。


特長

(1)雪質は良好。トップの標高は約1,800mだ。

(2)メインのゲレンデ(ハイランドエリア)は、どちらかというと硬派向け。選手クラスの高速スキーヤーが多い。

晴天が続くと、上部はアイスバーンになりやすく、手強い。

2018年は、全国高等学校スキー大会東京都予選会、東京都高等学校春季スキー大会が開催される。

11月下旬からゴールデンウィークまで滑れる。

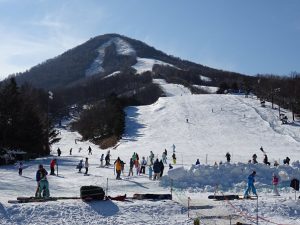
⑨ハイランドエリアのベース

(3)サブのゲレンデ(カマンエリア、ハイシーズンの土日祝日のみ営業)は混雑知らずで、家族連れやカップルが多い。

⑩カマンエリアのトップ

なお、私は、シーズン中、お気に入りのスノーリゾートの定宿に用具一式を預ってもらい、電車で、かつ少ない荷物で、行き来する方法も採用しています。

それではHave a nice skiing/riding!

Take me out to ski by train♪

Japanese Version

Hi, this is Fe@NJ, who has passed Second Grade of Timetable Test in Japan.

Winter sports are in the midst of the season!

General speaking, the transportation to the snow resort for skiing and/or snowboarding might be by car or chartered direct bus service to the site.   Nevertheless, I, a railway fan, would like to introduce Go to ski and snowboard by train (plus hot springs and Pokémon).  As a suggestion, for two snow resorts that can be reached from the metropolitan area on a one-way 3-hour basis, let me introduce Manza Onsen Ski Area” and “Kazawa Snow Area.  Both of them can enjoy not only the greatest snow quality on season but also spa after the sports, although they are medium to small scale.  In addition, note that they are not crowded because of inconvenient location in terms of public transportation.

1. The advantage of going by train is as follows:
(1) Easy, their seats are wider than buses’, no seat belts.
(2) Fast, time accuracy, no traffic jam.
(3) You can play with Pokémon in the train.

2. The disadvantage going by train is as follows:
(1) Transfer is tough.
(2) Traveling luggage is troublesome.
(3) Transportation between the nearest station and the resort must be considered separately.

3. The nearest station of each snow resort is JR East’s Manza Kazawaguchi station; which I mentioned on past topics.

①A green bold line shows JR East’s Line from Ueno to Manza Kazawaguchi.

②Limited Express Kusatsu

③The Green Car (First Class) of Kusatsu

Take the limited express Kusatsu No.1″ from Ueno Station of JR East. (Departs at 10:00)
At Naganohara Kusatsuguchi station, the final stop of Kusatsu, the passengers shall change to the local train.  This transfer is untroubled since they can transfer on the same platform.

(Arrives at 12:18 -> Departs at 12:24)

Get off at the fourth station, Manza Kagasawaguchi Station. (Arrives at 12:42)
Its plathome of the station is built on the embankment, and descend the stairs to change to the ground transportation system (bus, taxi etc.).

Don’t forget!  There is a Pokémon gym.

In addition, please check the schedule of trains and buses in the latest timetable.


Manza Onsen Ski Area

Take Seibu Group’s bus. (Departs at 13:01)
On arrival at Manza Bus Terminal (Arrives at 13:44), the minibus of each accommodation shall come to pick up.

A shuttle bus service is available between each accommodation facility and Manza Onsen Ski Area.
④Shuttle Bus Stop


Whereas it is the moving day, after arrival, I would consider that it is good to ride for two to three hours in order to break in, or to accept and appreciate the open-air spa above the clouds.

Features
(1) The snow quality is truly excellent boasting a top altitude of about 6,500 ft.
(2) The main area is directly connected with Manza Prince Hotel, which I feel glamorous.

⑤The Top of main area

⑥The sign indicates the prefectural boundary between Gunma and Nagano


(3) The second area, along Manzayama Chair Lift, for intermediates, is a great place.
(4) The extensive scenery!  When it is fine weather, we could observe Mt. Fuji beyond Mt. Asama.

⑦Zooming up, therein, Mt. Fuji beyond Mt. Asama.

⑧Through the forest

Note

(1) As of this writing, the regular bus service between Manza Kazawaguchi Station and Manza Bus Terminal is only four round-trip a day.

(2) If you really want to slide in the afternoon in full, get the 09:35 bus from Karuizawa Station of Hokuriku Shinkansen.  You arrive at Manza Bus Terminal at 11:19.


Kazawa Snow Area

The other option, from Manza Kazawaguchi Station, is Kazawa Snow Area.
There is no regular bus route connecting this station and the ski resort.
When booking an accommodation, you may either ask for a plan with picking up by minibus or reserve a taxi from the station.  It takes approximately 25 minutes to go.

Features
(1) The altitude of the top is about 6,000 ft., so that the snow quality is great.
(2) We find many high-speed skiers, categorized into expert class in the main area, Highland area.  If the clear sky continues, its upper part tends to be ice burn and more challenged.  It opens from late November to early May.
In 2018, the National High School Ski Games as Tokyo Preliminaries and the Tokyo Metropolitan High School Spring Skiing Games will be held.

⑨The base of Highland area

(3) The second area, Come-on Area, only open on weekends and holidays in the high season, is a great place for families and couples.

⑩The top of Come-on area

In addition, during the season, I often deposit my complete set of the equipment at the resort, then, I return home and come back by train and with less packages.


Thank you and have a nice skiing and/or snowboarding in Japan!
Japan IT Week 関西2018 in インテックス大阪 出展報告

2018年2月21日(水)~2月23日(金) インテックス大阪において、Japan IT Week 関西2018の展示会にラネクシー様と共同でブース出展しました。Japan IT Week 関西は、クラウド、AI、IoT、ビッグデータ、情報セキュリティなど、合計8つのIT専門展から構成されており、弊社は情報セキュリティゾーンに「ActiveImage Protector 2018」とラネクシー様の「DeviceLock」を出展しました。

展示会の風景

展示会場となったインテックス大阪(正面)です。う~ん、それにしても大阪市内から遠い場所にあります。

弊社の展示ブースです。展示台の奥には商談コーナーとしてテーブルと椅子が置かれていますが、3日間の展示会においては、説明員のよい休息の場ともなりました。

入場登録の受付前です。多くの人であふれかえっていました。

情報セキュリティゾーンの展示会場の入口です。

弊社のブースにも、おかげさまで多くのお客様にお立ち寄りいただき、様々な情報交換や生の声を得られる、とても良い機会となりました。

女性には特に丁寧な説明を心がけています。

最後に

今回も多くのお客様に、お立ち寄りいただきありがとうございました。また、製品の詳細説明をご希望されたお客様には、可能な限りお伺いさせていただきますので、よろしくお願いいたします。

また、正式発表前ですがActiveImage Protectorをベースに開発した、PCやサーバのDeployment(展開作業)用の製品のリリースを近々に予定していますので、よろしくお願いいたします。


番外編

弊社のノベルティー:

NEC様のCLUSTERPROとActiveImageのコラボグッツ(ポケットティシュ入れとレポート用紙)を配布しました。

ラネクシー様のノベルティー:

なんと、ブランド品の今治ハンドタオルだそうです。(赤矢印の部分)

ネットジャパンセミナー便り35号 ~2018年3月セミナー日程

2月も後半になりましたが、まだまだ寒い日が続いていますね。平昌オリンピックの男子フィギュアスケートでの羽生選手と宇野選手の金銀獲得を初めとする日本選手の活躍や、将棋会では15歳の中学生、藤井棋士が国民栄誉賞を授与した羽生棋士を破って優勝する、という若い日本人の活躍するニュースが日本を元気にしてくれていますね。

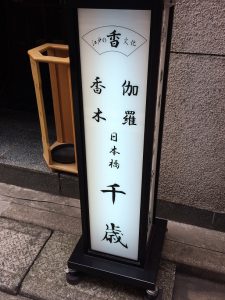
暖かい春ももうすぐ!今年の私のキーワードは“開運”です。まずは暫くご無沙汰していたお墓参りに行こう、と決めていたのでお墓参りに持っていくお線香を探しに、お香の専門店「日本橋 千歳」に行って来ました。

狭い店内でしたが、優しい香りが漂っていて心落ち着く空間でした。店主が調合したオリジナルのお線香だそうで、購入前に好きな香りを選ぶことも出来ました。「沢山でなく数本でも香りの良いものをご先祖様にお供えしたら、きっとご先祖様もお喜びになりますよ!」とお店の方がおっしゃっていました。営業時間が平日の10時から17時で、お昼休みが13時から14時です。最初に行った日は営業時間外でした。事前に電話をしておけばお店を開けておいて下さるそうです。
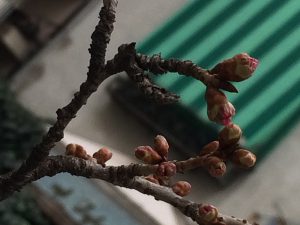
あじさい通りのおかめざくらも沢山花芽が着いてきています。

そして2018年3月のセミナーは仮想環境のバックアップや移行に大変便利なActiveImage Protector仮想環境向け製品のセミナーです。

新年度に向けて、利用されているシステムのバックアップは万全ですか?

是非、思い立った時が吉日!ネットジャパンのセミナーでActiveImage Protectorをお試しください。

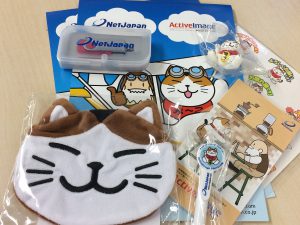
3月の受講プレゼントは、年度末スペシャル!ノベルティセットです。


3月7日(水)ActiveImage Protector for Hyper-V Enterprise 14時から17時

第一部はActiveImage Protectorのデモを交えた製品概要説明

第二部は実機を使用した体験です。実習内容は以下になります。

  1. for Hyper-V Enterpriseのインストール
  2. バックアップの設定
  3. 通常圧縮と重複排除を使用した際のバックアップファイルの圧縮率の違いを確認
  4. イメージのマウント機能を利用して、ファイルの復元を実行
  5. ReZoom it!を実行して、異なるHyper-Vホストに仮想マシンを復元


3月14日(水) ActiveImage Protector Virtual Edition 14時から17時

第一部はActiveImage Protectorのデモを交えた製品概要説明

第二部は実機を使用した体験です。実習内容は以下になります。

  1. Server Editionのインストール
  2. 重複排除圧縮機能を含めたバックアップ設定
  3. バックアップイメージを仮想へ移行
  4. ImageBootを利用して仮想環境上でイメージファイルを起動
  5. Linux Editionのインストールとバックアップ設定

セミナーのお申込みはこちらから

https://www.netjapan.com/jp/local-japan/seminar

Cast Iron Chili and Cornbread

Japanese Version

Winter is one of my favorite times of the year. Even though it is cold and sometimes uncomfortable, I really enjoy the sunny weather and crispness of cold air. Whenever this time of year comes around one of my favorite activities is to make a delicious winter tradition in my family, chili. Indeed in many parts of America winter is a time for making such dishes and there are even cook-off competitions to see who can make the very best chili.

Chili comes in many different recipes and there are various ways of cooking it, some are spicy some are mild and some are beefy. It seems that almost everyone has their own special way of making chili, and for me that begins with a 100% cast iron dutch oven cookware. I have a collection of cast iron cookware but for making chili my favorite is the Lodge 10 ¼ inch kitchen dutch oven.The reason I like to make chili in this particular dutch oven is because I can make it anytime in the comfort of my kitchen on my IH range without having to use coals as a heat source.

So what is my version of chili? It all begins with the base ingredients. I start of with a KG of ground beef ( sometimes I use chuck or roast) and let it cook just until it’s done. Then add in a few cloves of freshly chopped garlic, a large yellow onion, several green peppers and saute them until the onions translucent.

After this in goes some diced tomatoes and tomato sauce. Of course it wouldn’t be chili without the special ingredient of chili, so in goes the chili powder, cumin, oregano, fresh rosemary, thyme and some special ingredients I am not at liberty to say ( a family secret).

In my opinion, you cannot make good chili without adding some beans to it. I prefer red kidney beans, but if I have none of those, pinto beans also do a fine job. Of course the last part of making dutch oven chili is the probably the most important, let it cook on a very low heat for 5 or 6 hours to really bring out all the wonderful flavours.

No chili dish would be complete without a side of good old fashioned cornbread. When making cornbread I also use a trustly old cast iron skillet. This one is a Lodge 10” skillet and makes the perfect baking pan for moist crumbly delicious cornbread.

Corn bread isn’t hard to make, just a little flour, cornmeal, sugar, baking soda-powder, eggs and pinch salt. I melt a few tablespoons of butter in the skillet and then dump in the batter and put it in the oven for 25 minutes and it comes great every time. After it cools for a good 20 minutes then spread some butter on top with a drizzle of honey.

So if winter has got you feeling a little down may I suggest some cast iron dutch oven home cooked chili and cornbread to raise your spirits? It works for me everytime.